Electronic Music Production Course
Course Name Electrnoic Music Production Course in Chandigarh
Duration 3 Month
Batch Timing 9 To 11, 11 To 1, 1 To 3, 3 To 5, 5 To 7
Daw Fl Studio

Electronic Music Production Institute in Chandigarh

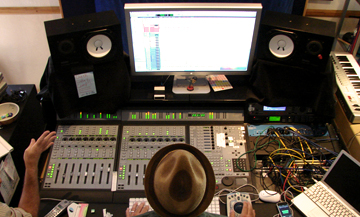
The magic of computer draws up unmatched possibilities of recorded sound, but if you do not have the necessary skills to use it using the latest tools, it is more or less a futile exercise. The Electronic Music Production Course In Chandigarh is well rounded course that covers all the major aspects of modern day music production. We at Backstreet Music Academy pride ourselves for offering the best Electronic Music Production Course In Chandigarh  enabling students to start with an idea and develop that idea into a full fledged composition.Luckily, your knowledge to electronic music production and sound design, such as setting up your home Studio with software and hardware integration, MIDI sequencing, mixing is now accessible. It doesn’t matter if you have experience in performing electronic music or you are an absolute rookie looking to fill in gaps in your skills, this schedule assists you in your requirement to raise your level in music production.

Course Content

Overview

  • Knowledge of DAW
  • Producing Beats
  • Arranging Tracks
  • Managing Tracks
  • How to Process
  • Practical Project

Understanding Daw (Workflow in Daw)

  • What is a Digital Audio Workstation

  • Signal Flow | Equipment You Need

  • Setting Up Your System

  • Setting Audio Preferences

  • Setting MIDI Preferences

  • Optimizing Performance

  • Introduction to Session View

  • Understanding Ableton’s Interface

  • Live’s Browser

  • Loading, Playing, Stopping, Copying and Moving Clips

  • MIDI and Audio Clip Properties

  • Working with Scenes

  • Setting Tempo and Meter Changes to Scenes

  • Using Live’s Browser

  • Auditioning Clips and Devices

  • Understating File Structure and Saving Live Set

  • Managing Files

  • Exporting Clips and Devices

  • Preparation to Record MIDI

  • Recording and Overdubbing MIDI

  • Using Computer to Enter MIDI

  • Using the Step Sequencer to Enter MIDI

  • Using the Pencil Tool to Enter MIDI

  • Understanding MIDI Editor

  • Configuring Grids

  • Quantizing | Quantizing with Grooves | Live Quantizing

  • Fold View in the Editor | Legato Option

  • Editing MIDI Velocities

  • Using Multi-Output Devices

  • Recording Audio

  • Different Monitoring Modes

  • Understanding Arrangement View

  • Grids in Arrangement View | Permanent Scrub Areas

  • Recording in Arrangement View

  • Using Punch-In and Punch-Out Switches

  • Back to Arrange View Button

  • Using Locaters

  • Editing Regions in Arrangement View

  • Re-Working Clips

  • Exclusive Arm and Solo

  • Using Sends and Returns

  • 2 Ways of Building Headphone Cues

  • Grouping Tracks

  • Using Effect Devices

  • The Hot Swap Switch

  • EQ and Filters

  • Soloing Different EQ Bands

  • EQ-ing in Stereo, L/R and M/S

  • Compressors and Dynamic Processing

  • Different Types of Delay Effect Processing

  • Using Reverb Effectively

  • Side-Chain Gating and Side-Chain Compression

  • Using MIDI Effects

  • Arpeggiator | Chord | Scale

  • Automation Envelopes

  • Recording Real-Time Automation

  • Drawing Automation Manually

  • Automating Clips in Session View

  • Unlinking Clip Length and Automation Length

  • Editing Automation

  • Using Fades and Cross-Fades

  • Live Racks

  • FX Racks

  • Nested Racks

  • Effects in Series and Parallel

  • Using FX Chains

  • Instrument Racks

  • Key-Zone Editor and Velocity-Zone Editor

  • Drum Racks

  • I/O, Sends and Returns Inside the Drum Rack

  • Choking Samples

  • Using Macros